Check your package.json
NEW
| Version | Vulnerabilities | License Risk | |||
|---|---|---|---|---|---|
| 0.0.1 | | | 06/2018 | Popular
|
|
|
Scan your projects for vulnerabilities. Fix quickly with automated fixes. Get started with Snyk for free.
Get started freeThe npm package humus receives a total of 89 downloads a week. As such, we scored humus popularity level to be Limited.
Based on project statistics from the GitHub repository for the npm package humus, we found that it has been starred ? times.
Downloads are calculated as moving averages for a period of the last 12 months, excluding weekends and known missing data points.
This project has seen only 10 or less contributors.
Further analysis of the maintenance status of humus based on released npm versions cadence, the repository activity, and other data points determined that its maintenance is Inactive.
An important project maintenance signal to consider for humus is that it hasn't seen any new versions released to npm in the past 12 months, and could be considered as a discontinued project, or that which receives low attention from its maintainers.
In the past month we didn't find any pull request activity or change in issues status has been detected for the GitHub repository.
humus has more than a single and default latest tag published for the npm package. This means, there may be other tags available for this package, such as next to indicate future releases, or stable to indicate stable releases.
 Express Starter


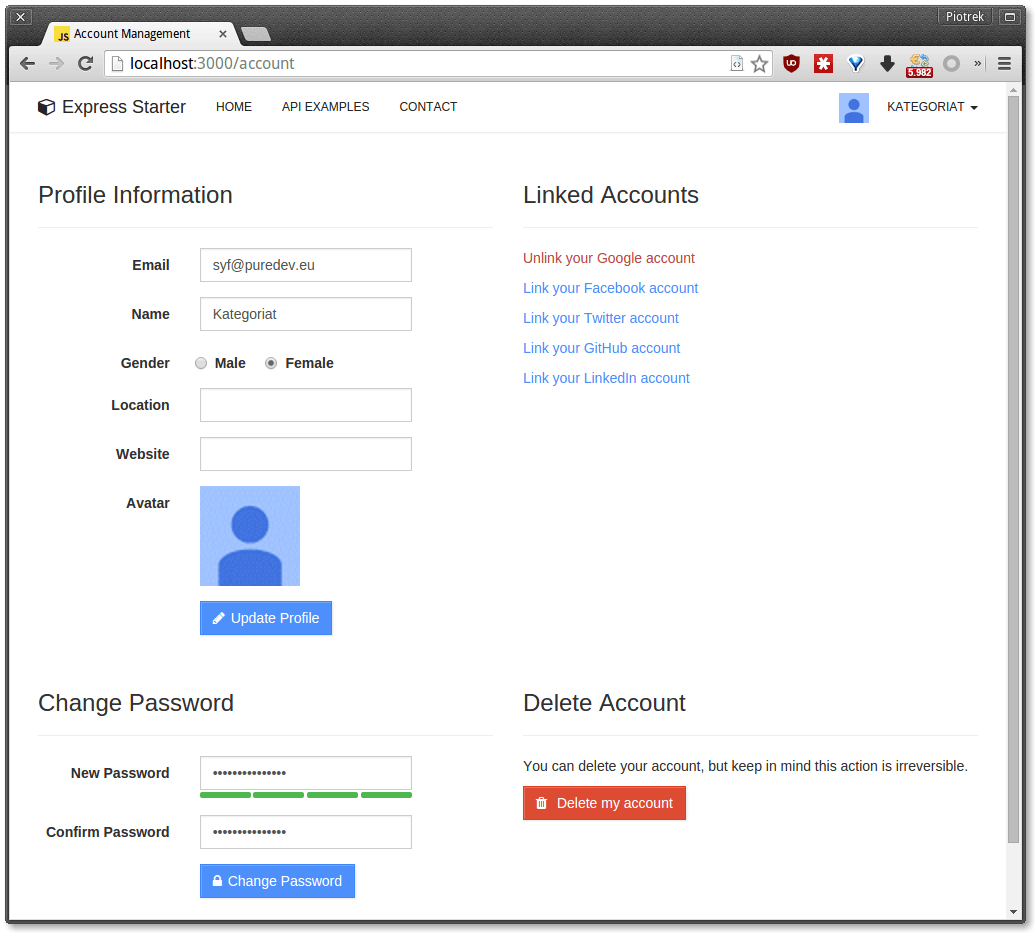
Live Demo:
A boilerplate for Node.js web applications, which use RDBS (relational database system) with prefered PostgreSQL instead of overhyped MongoDB.
Project based on and inspired by Hackathon Starter.
With this boilerplate you can start a brand new application using node.js with multiple base features working out-of-a-box. So you can focus on the important stuff you want to create.
Take a look on the Features section to see what's already done for you!
There are tons of MEAN boilerplates and even more node.js stacks that include MongoDB by default. But there is a shortage of good and easy-to-use starters for people who want to use relational databases.
Why should you use RDBS? That's a very good question. But the better would be to ask: Why should you use NoSQL database in the first place?
There are some situations when NoSQLs are very wise choice, but in the most cases in your applications you will need to store relational data and you want to store it safely and process stored info very quickly. And to that you don't need a MongoDB.
For some time there was a very big advantage in using MongoDB with the node.js applications. That is, it was a really easy and straightforward to save and retrieve any json object using just a one-liner, which at that point was not that easy with relational databases.
Problem was partially solved by PostgreSQL 9.3 which introduced a new JSON field type, which allows not only to store any JSON object, but also query it as well. And you still have a proper and ACID-compliant relational database!
So, if you care about security of your data AND performance AND reliability AND you want to use node.js stack, then you should avoid MEAN and at least try Express Starter.
xcode-select --install)sudo apt-get install build-essentialsudo dnf groupinstall "Development Tools"sudo zypper install --type pattern devel_basisThe easiest way to get started is to clone the repository:
# Get the latest snapshot
$ git clone https://github.com/yhnavein/express-starter.git myproject
$ cd myproject
$ git remote rm origin

# Install NPM dependencies
$ npm install -d

# Adjust settings to your needs
$ vim config/secrets.js

$ node app.js
In config/secrets.js you may want to change database configuration. You don't have to change all API keys, because they will work on your localhost without any hassle. You will need to change API keys, when deploying application to the server.
Note: It is recommended to store your API keys and other sensitive data as environment variables. This project uses the 'dotenv' package to retrieve the contents of a '.env' file in your root directory. To store your variables create a '.env' file in the root directory (the same place that app.js is) and place you environment variables in the following format:
SESSION_SECRET=YourSessionSecretGoesHere
Then, make sure you add this line
.env
to your .gitignore file. and you can now access the SESSION_SECRET variable in the secrets.js file as:
process.env.SESSION_SECRET
Note: I highly recommend installing Nodemon.
It watches for any changes in your node.js app and automatically restarts the
server. Once installed, instead of node app.js use nodemon app.js. It will
save you a lot of time in the long run, because you won't need to manually
restart the server each time you make a small change in code. To install, run
sudo npm install -g nodemon.
To use any of the included APIs or OAuth authentication methods, you will need to obtain appropriate credentials: Client ID, Client Secret, API Key, or Username & Password. You will need to go through each provider to generate new credentials.
Important Notice: I have included dummy keys and passwords for all API examples to get you up and running even faster. But don't forget to update them with your credentials when you are ready to deploy an app.
 - Visit [Google Cloud Console](https://cloud.google.com/console/project)
- Click on the **Create Project** button
- Enter *Project Name*, then click on **Create** button
- Then click on *APIs & auth* in the sidebar and select *API* tab
- Click on **Google+ API** under *Social APIs*, then click **Enable API**
- Next, under *APIs & auth* in the sidebar click on *Credentials* tab
- Click on **Create new Client ID** button
- Select *Web Application* and click on **Configure Consent Screen**
- Fill out the required fields then click on **Save**
- In the *Create Client ID* modal dialog:
- **Application Type**: Web Application
- **Authorized Javascript origins**: https://localhost:3000
- **Authorized redirect URI**: https://localhost:3000/auth/google/callback
- Click on **Create Client ID** button
- Copy and paste *Client ID* and *Client secret* keys into `config/secrets.js`
- Visit [Google Cloud Console](https://cloud.google.com/console/project)
- Click on the **Create Project** button
- Enter *Project Name*, then click on **Create** button
- Then click on *APIs & auth* in the sidebar and select *API* tab
- Click on **Google+ API** under *Social APIs*, then click **Enable API**
- Next, under *APIs & auth* in the sidebar click on *Credentials* tab
- Click on **Create new Client ID** button
- Select *Web Application* and click on **Configure Consent Screen**
- Fill out the required fields then click on **Save**
- In the *Create Client ID* modal dialog:
- **Application Type**: Web Application
- **Authorized Javascript origins**: https://localhost:3000
- **Authorized redirect URI**: https://localhost:3000/auth/google/callback
- Click on **Create Client ID** button
- Copy and paste *Client ID* and *Client secret* keys into `config/secrets.js`
Note: When you ready to deploy to production don't forget to
add your new url to Authorized Javascript origins and Authorized redirect URI,
e.g. https://my-awesome-app.herokuapp.com and
https://my-awesome-app.herokuapp.com/auth/google/callback respectively.
The same goes for other providers.
 - Visit [Facebook Developers](https://developers.facebook.com/)
- Click **Apps > Create a New App** in the navigation bar
- Enter *Display Name*, then choose a category, then click **Create app**
- Copy and paste *App ID* and *App Secret* keys into `config/secrets.js`
- *App ID* is **clientID**, *App Secret* is **clientSecret**
- Click on *Settings* on the sidebar, then click **+ Add Platform**
- Select **Website**
- Enter `https://localhost:3000` for *Site URL*
- Visit [Facebook Developers](https://developers.facebook.com/)
- Click **Apps > Create a New App** in the navigation bar
- Enter *Display Name*, then choose a category, then click **Create app**
- Copy and paste *App ID* and *App Secret* keys into `config/secrets.js`
- *App ID* is **clientID**, *App Secret* is **clientSecret**
- Click on *Settings* on the sidebar, then click **+ Add Platform**
- Select **Website**
- Enter `https://localhost:3000` for *Site URL*
Note: After a successful sign in with Facebook, a user will be redirected back to home page with appended hash #_=_ in the URL. It is not a bug. See this Stack Overflow discussion for ways to handle it.
 - [Sign up](https://stripe.com) or log into your [dashboard](https://manage.stripe.com)
- Click on your profile and click on Account Settings
- Then click on [API Keys](https://manage.stripe.com/account/apikeys)
- Copy the **Secret Key**. and add this into `config/secrets.js`
- [Sign up](https://stripe.com) or log into your [dashboard](https://manage.stripe.com)
- Click on your profile and click on Account Settings
- Then click on [API Keys](https://manage.stripe.com/account/apikeys)
- Copy the **Secret Key**. and add this into `config/secrets.js`
 - Go to [foursquare for Developers](https://developer.foursquare.com/)
- Click on **My Apps** in the top menu
- Click the **Create A New App** button
- Enter *App Name*, *Welcome page url*,
- For **Redirect URI**: https://localhost:3000/auth/foursquare/callback
- Click **Save Changes**
- Copy and paste *Client ID* and *Client Secret* keys into `config/secrets.js`
- Go to [foursquare for Developers](https://developer.foursquare.com/)
- Click on **My Apps** in the top menu
- Click the **Create A New App** button
- Enter *App Name*, *Welcome page url*,
- For **Redirect URI**: https://localhost:3000/auth/foursquare/callback
- Click **Save Changes**
- Copy and paste *Client ID* and *Client Secret* keys into `config/secrets.js`
 - Go to https://www.mailgun.com
- Sign up and add your *Domain Name*
- From the domain overview, copy and paste the default SMTP *Login* and *Password* into `config/secrets.js`
- Go to https://www.mailgun.com
- Sign up and add your *Domain Name*
- From the domain overview, copy and paste the default SMTP *Login* and *Password* into `config/secrets.js`
| Name | Description |
|---|---|
| config/passport.js | Passport Local and OAuth strategies, plus login middleware. |
| config/secrets.js | Your API keys, tokens, passwords and database URL. |
| controllers/api.js | Controller for /api route and all api examples. |
| controllers/contact.js | Controller for contact form. |
| controllers/home.js | Controller for home page (index). |
| controllers/user.js | Controller for user account management. |
| models/sequelize/User.js | Sequelize schema and model for User. |
| models/sequelize/Session.js | Schema for Session table (used for convenience) |
| models/sequelize/index.js | Tool for easy managing all of the table schemas |
| public/ | Static assets (fonts, css, js, img). |
| public/js/application.js | Specify client-side JavaScript dependencies. |
| public/js/main.js | Place your client-side JavaScript here. |
| public/css/main.less | Main stylesheet for your app. |
| public/css/themes/default.less | Some Bootstrap overrides to make it look prettier. |
| views/account/ | Templates for login, password reset, signup, profile. |
| views/api/ | Templates for API Examples. |
| views/partials/flash.ejs | Error, info and success flash notifications. |
| views/partials/header.ejs | Navbar partial template. |
| views/partials/footer.ejs | Footer partial template. |
| views/layout.ejs | Base template. |
| views/home.ejs | Home page template. |
| app.js | Main application file. |
Note: There is no preference how you name or structure your views.
You could place all your templates in a top-level views directory without
having a nested folder structure, if that makes things easier for you.
Just don't forget to update extends ../layout and corresponding
res.render() paths in controllers.
| Package | Description |
|---|---|
| bcrypt-nodejs | Library for hashing and salting user passwords. |
| bitgo | Multi-sig Bitcoin wallet API. |
| cheerio | Scrape web pages using jQuery-style syntax. |
| clockwork | Clockwork SMS API library. |
| connect-assets | Compiles LESS stylesheets, concatenates & minifies JavaScript. |
| csso | Dependency for connect-assets library to minify CSS. |
| ejs | Template engine for Express. |
| ejs-mate | Layouts and partials support for the EJS |
| express | Node.js web framework. |
| body-parser | Express 4.0 middleware. |
| cookie-parser | Express 4.0 middleware. |
| morgan | Express 4.0 middleware. |
| multer | Express 4.0 middleware. |
| compression | Express 4.0 middleware. |
| errorhandler | Express 4.0 middleware. |
| method-override | Express 4.0 middleware. |
| serve-favicon | Express 4.0 middleware offering favicon serving and caching. |
| express-flash | Provides flash messages for Express. |
| express-session | Express 4.0 middleware. |
| express-validator | Easy form validation for Express. |
| fbgraph | Facebook Graph API library. |
| github-api | GitHub API library. |
| knex | SQL query builder (useful but not mandatory) |
| lastfm | Last.fm API library. |
| less | LESS compiler. Used implicitly by connect-assets. |
| lob | Lob API library |
| lusca | CSRF middleware. |
| node-linkedin | LinkedIn API library. |
| neo-async | Utility library that provides asynchronous control flow. |
| passport | Simple and elegant authentication library for node.js |
| passport-facebook | Sign-in with Facebook plugin. |
| passport-github | Sign-in with GitHub plugin. |
| passport-google-oauth | Sign-in with Google plugin. |
| passport-twitter | Sign-in with Twitter plugin. |
| passport-local | Sign-in with Username and Password plugin. |
| passport-linkedin-oauth2 | Sign-in with LinkedIn plugin. |
| passport-oauth | Allows you to set up your own OAuth 1.0a and OAuth 2.0 strategies. |
| paypal-rest-sdk | PayPal APIs library. |
| pg | PostgreSQL client |
| pg-hstore | Module for handling JSON data in Postgres (required if you use JSON) |
| request | Simplified HTTP request library. |
| sequelize | Multi-dialect ORM for node.js |
| SendGrid | Library for sending emails through SendGrid platform. |
| stripe | Offical Stripe API library. |
| twilio | Twilio API library. |
| twit | Twitter API library. |
| lodash | Handy JavaScript utlities library. |
| uglify-js | Dependency for connect-assets library to minify JS. |
| validator | Used in conjunction with express-validator in controllers/api.js. |
| mocha | Test framework. |
| expect.js | BDD/TDD assertion library. |
| supertest | HTTP assertion library. |
| yui | Used by the Yahoo API example. |
filesize(265318); // "265.32 kB".package.json as well. For example, npm install --save moment.403 Error: Forbidden when submitting a form?You need to add the following hidden input element to your form. This has been added in the pull request #40 as part of the CSRF protection.
<input value="<%= _csrf %>" name="_csrf" type="hidden">
Note: It is now possible to whitelist certain URLs. In other words you can specify a list of routes that should bypass CSRF verification check.
Note 2: To whitelist dynamic URLs use regular expression tests inside the
CSRF middleware to see if req.originalUrl matches your desired pattern.
This is how you typically define static files inside HTML, Jade or any template for that matter:
Simple enough right? But wouldn't it be nice to have it just like that in development mode, but when you deploy your app to production, have it minified and concatenated into a single file automatically without any extra effort on your part?
As soon as you start bringing in more JavaScript libraries, the benefits of concatenating and minifying JavaScript files will be even greater. Using connect-assets library, it is as as simple as declaring these two lines:
<%- css('main') %>      // expects public/css/styles.less
<%- js('application') %>  // expects public/js/application.js
Tip: We can use css and js functions in Jade templates because in
connect-assets middleware options we have added this line: helperContext: app.locals.
The only thing you need to remember is to define your JavaScript files inside
public/js/application.js using this strange syntax notation (Sprockets-style)
borrowed from Rails. I know it's an extra thing to learn for someone who has
never seen Rails asset pipeline before, but in this case, I think benefits
outweigh the cost.
//= require lib/jquery-2.1.0.min
//= require lib/bootstrap.min
//= require main
Using this approach, when working in development mode, connect-assets will
load each file individually, without minifying or concatenating anything.
When you deploy your app, it will run in production mode, and so connect-assets
will automatically serve a single concatenated & minified application.js.
For more information see Sprockets-style concatenation
section.
Chances are you haven't changed the Database URI in secrets.js. If db is
set to localhost, it will only work on your machine as long as PostgreSQL is
running. When you deploy to Heroku, OpenShift or some other provider, you will not have PostgreSQL running on localhost. If provider use DATABASE_URL node variable it should be configured out of the box (Heroku), but either way, please take a look on deploying documentation.
For the sake of simplicity. While there might be a better approach,
such as passing app context to each controller as outlined in this
blog,
I find such style to be confusing for beginners.
It took me a long time to grasp the concept of exports and module.exports,
let alone having a global app reference in other files.
That to me is a backward thinking.
The app.js is the "heart of the app", it should be the one referencing
models, routes, controllers, etc.
When working solo on small projects I actually prefer to have everything inside app.js as is the case with this
REST API server.
Absolutely. But unlike a regular footer there is a bit more work involved.
First, delete #wrap and #footer ID selectors and html, body { height: 100%; }
from styles.less. Next, delete #wrap and #footer lines from layout.ejs
(By the way, if no element is specified before class or id, Jade assumes it is
a div element). Don't forget to indent everything under #wrap to the left
once, since this project uses two spaces per block indentation.
If you would like to use Persona authentication strategy, use the pull request #64 as a reference guide. I have explained my reasons why it could not be merged in issue #63.
Yes you can! Although you will have to manually convert all existing stylesheets
to Sass, which shouldn't be too hard considering how similar Sass and LESS are.
Simply rename styles.less to styles.scss and connect-assets will
automatically use Sass preprocessor.
Your are not limited to just Sass or LESS, you could use both if you want to. In layout.ejs simply specify LESS and Sass stylesheets separately:
<%- css('styles') %>  # public/css/styles.less
<%- css('my_sass_styles') %>  # public/css/my_sass_styles.scss
And as I already mentioned you do not need to specify the file extension, connect-assets will automatically figure out which CSS preprocessor to use based on the filetype.
Note: I did not include node-sass module in package.json, so you will
have to install it yourself by running npm install --save node-sass.
This section is intended for giving you a detailed explanation about how a particular functionality works. Maybe you are just curious about how it works, or maybe you are lost and confused while reading the code, I hope it provides some guidance to you.
Flash messages allow you to display a message at the end of the request and access
it on next request and only next request. For instance, on a failed login attempt, you would
display an alert with some error message, but as soon as you refresh that page or visit a different
page and come back to the login page, that error message will be gone. It is only displayed once.
This project uses express-flash module for flash messages. And that
module is built on top of connect-flash, which is what I used in
this project initially. With express-flash you don't have to
explicity send a flash message to every view inside res.render().
All flash messages are available in your views via messages object by default,
thanks to express-flash.
Flash messages have a two-step process. You use req.flash('errors', { msg: 'Error messages goes here' }
to create a flash message in your controllers, and then display them in your views:
<% if(messages.errors) { %>
<div class="alert alert-danger fade in">
<button class="close" data-dismiss="alert" type="button">
<span class="ion-close-circled"></span>
</button>
<% for(msg in messages.errors) { %>
<div> <%= msg.msg %> </div>
<% } %>
</div>
<% } %>
In the first step, 'errors' is the name of a flash message, which should match the
name of the property on messages object in your views. You place alert messages
inside if message.errors because you don't want to show them flash messages are actually present.
The reason why you pass an error like { msg: 'Error messages goes here' } instead
of just a string - 'Error messages goes here', is for the sake of consistency.
To clarify that, express-validator module which is used for validating and sanitizing user's input,
returns all errors as an array of objects, where each object has a msg property with a message
why an error has occurred. Here is a more general example of what express-validator returns when there are errors present:
[
  { param: "name", msg: "Name is required", value: "" },
  { param: "email", msg: "A valid email is required", value: "" }
]
To keep consistent with that style, you should pass all flash messages
as { msg: 'My flash message' } instead of a string. Otherwise you will just see an alert box
without an error message. That is because, in partials/flash.ejs template it will try to output
error.msg (i.e. "My flash message".msg), in other words it will try to call a msg method on a String object,
which will return undefined. Everything I just mentioned about errors, also applies
to "info" and "success" flash messages, and you could even create a new one yourself, such as:
Data Usage Controller (Example)
req.flash('warning', { msg: 'You have exceeded 90% of your data usage' });
User Account Page (Example)
<% if(messages.warning) { %>
<div class="alert alert-warning fade in">
<button class="close" data-dismiss="alert" type="button">
<span class="ion-close-circled"></span>
</button>
<% for(msg in messages.warning) { %>
<div> <%= msg.msg %> </div>
<% } %>
</div>
<% } %>
partials/flash.ejs is a partial template that contains how flash messages
are formatted. Previously, flash
messages were scattered throughout each view that used flash messages
(contact, login, signup, profile), but now, thankfully it is uses a DRY approach.
The flash messages partial template is included in the layout.ejs, along with footer and navigation.
body
  #wrap
    include partials/navigation
    .container
      include partials/flash
      block content
  include partials/footer
If you have any further questions about flash messages, please feel free to open an issue and I will update this mini-guide accordingly, or send a pull request if you would like to include something that I missed.
A more correct way to be to say "How do I create a new route". The main file app.js contains all the routes.
Each route has a callback function associated with it. Sometimes you will see 3 or more arguments
to routes. In cases like that, the first argument is still a URL string, while middle arguments
are what's called middleware. Think of middleware as a door. If this door prevents you from
continuing forward, you won't get to your callback function. One such example is a route that requires authentication.
app.get('/account', passportConf.isAuthenticated, userController.getAccount);
It always goes from left to right. A user visits /account page. Then isAuthenticated middleware
checks if you are authenticated:
exports.isAuthenticated = function(req, res, next) {
  if (req.isAuthenticated()) {
    return next();
  }
  res.redirect('/login');
};
If you are authenticated, you let this visitor pass through your "door" by calling return next();. It then proceeds to the
next middleware until it reaches the last argument, which is a callback function that typically renders a template on GET requests or redirects on POST requests. In this case, if you are authenticated, you will be redirected to Account Management page, otherwise you will be redirected to Login page.
exports.getAccount = function(req, res) {
  res.render('account/profile', {
    title: 'Account Management'
  });
};
Express.js has app.get, app.post, app.put, app.delete, but for the most part you will only use the first two HTTP verbs, unless you are building a RESTful API.
If you just want to display a page, then use GET, if you are submitting a form, sending a file then use POST.
Here is a typical workflow for adding new routes to your application. Let's say we are building a page that lists all books from database.
Step 1. Start by defining a route.
app.get('/books', bookController.getBooks);
Note: As of Express 4.0 you can define you routes like so:
app.route('/books')
  .get(bookController.getBooks)
  .post(bookController.createBooks)
  .put(bookController.updateBooks)
  .delete(bookController.deleteBooks)
And here is how a route would look if it required an authentication and an authorization middleware:
app.route('/api/twitter')
  .all(passportConf.isAuthenticated)
  .all(passportConf.isAuthorized)
  .get(apiController.getTwitter);
  .post(apiController.postTwitter)
Use whichever style that makes sense to you. Either one is acceptable. I really think that chaining HTTP verbs on
app.route is very clean and elegant approach, but on the other hand I can no longer see all my routes at a glance
when you have one route per line.
Step 2. Create a new schema and a model Book.js inside the models/sequelize directory.
module.exports = function(db, DataTypes) {
  var Book = db.define('Book', {
    id: {
      type: DataTypes.STRING,
      allowNull: false,
      primaryKey: true
    },
    name: {
      type: DataTypes.STRING,
      allowNull: false
    }
  }, {
    tableName: 'books',
    timestamps: false
  });

  return Book;
};
Step 3. Create a new controller file called book.js inside the controllers directory.
/**
 * GET /books
 * List all books.
 */
var db = require('../models/sequelize');

exports.getBooks = function(req, res) {
  db.Book.findAll().then(function(docs) {
    res.render('books', { books: docs });
  });
};
Step 4. Import that controller in app.js.
var bookController = require('./controllers/book');
Step 5. Create books.ejs template.
<% layout('layout') -%>
<h1>All books</h1>
<ul>
<% books.forEach(function(book) { %>
<li> <%= book.name %> </li>
<% }); %>
</ul>
That's it! I will say that you could have combined Step 1, 2, 3 as following:
app.get('/books', function(req, res) {
  db.Book.findAll().then(function(docs) {
    res.render('books', { books: docs });
  });
});
Sure, it's simpler, but as soon as you pass 1000 lines of code in app.js it becomes a little difficult to navigate the file.
I mean, the whole point of this boilerplate project was to separate concerns, so you could
work with your teammates without running into MERGE CONFLICTS. Imagine you have 4 developers
working on a single app.js, I promise you it won't be fun resolving merge conflicts all the time.
If you are the only developer then it's fine. But as I said, once it gets up to a certain LoC size, it becomes
difficult to maintain everything in a single file.
That's all there is to it. Express.js is super simple to use. Most of the time you will be dealing with other APIs to do the real work: Sequelize for querying database, socket.io for sending and receiving messages over websockets, sending emails, form validation using express-validator library, parsing websites using Cheerio, and etc.
Dan Stroot submitted an excellent pull request that adds a real-time dashboard with socket.io. And as much as I'd like to add it to the project, I think it violates one of the main principles of the Express Starter: > When I started this project, my primary focus was on simplicity and ease of use. > I also tried to make it as generic and reusable as possible to cover most use cases of > hackathon web apps, without being too specific.
When I need to use socket.io, I really need it, but most of the time - I don't. But more importantly, websockets support is still experimental on most hosting providers. As of October 2013, Heroku supports websockets, but not until you opt-in by running this command:
heroku labs:enable websockets -a myapp
And what if you are deploying to OpenShift? They do support websockets, but it is currently in a preview state. So, for OpenShift you would need to change the socket.io connect URI to the following:
var socket = io.connect('https://yoursite-namespace.rhcloud.com:8000');
Wait, why is it on port 8000? Who knows, and if I didn't run across this blog post I wouldn't even know I had to use port 8000.
I am really glad that Heroku and OpenShift at least have a websockets support, because many other PaaS providers still do not support it. Due to the aforementioned issues with websockets, I cannot include socket.io as part of the Express Starter. For now... If you need to use socket.io in your app, please continue reading.
First you need to install socket.io:
npm install socket.io --save
Replace var app = express(); with the following code:
var app = express();
var server = require('http').Server(app);
var io = require('socket.io')(server);
I like to have the following code organization in app.js (from top to bottom): module dependencies,
import controllers, import configs, connect to database, express configuration, routes,
start the server, socket.io stuff. That way I always know where to look for things.
Add the following code at the end of app.js:
io.on('connection', function(socket) {
  socket.emit('greet', { hello: 'Hey there browser!' });
  socket.on('respond', function(data) {
    console.log(data);
  });
  socket.on('disconnect', function() {
    console.log('Socket disconnected');
  });
});
One last thing left to change:
app.listen(app.get('port'), function() {
to
server.listen(app.get('port'), function() {
At this point we are done with the back-end.
You now have a choice - to include your JavaScript code in Jade templates or have all your client-side
JavaScript in a separate file - in main.js. I will admit, when I first started out with Node.js and JavaScript in general,
I placed all JavaScript code inside templates because I have access to template variables passed in from Express
right then and there. It's the easiest thing you can do, but also the least efficient and harder to maintain. Since then I
almost never include inline JavaScript inside templates anymore.
But it's also understandable if you want take the easier road. Most of the time you don't even care about performance during hackathons, you just want to "get shit done" before the time runs out. Well, either way, use whichever approach makes more sense to you. At the end of the day, it's what you build that matters, not how you build it.
If you want to stick all your JavaScript inside templates, then in layout.ejs -
your main template file, add this to head block.
Note: Notice the path of the socket.io.js, you don't actually
have to have socket.io.js file anywhere in your project; it will be generated
automatically at runtime.
If you want to have JavaScript code separate from templates, move that inline
script code into main.js, inside the $(document).ready() function:
$(document).ready(function() {

  // Place JavaScript code here...
  var socket = io.connect(window.location.href);
  socket.on('greet', function (data) {
    console.log(data);
    socket.emit('respond', { message: 'Hello to you too, Mr.Server!' });
  });

});
And that's it, we are done!
If you want to see a really cool real-time dashboard check out this live example. Refer to the pull request #23 to see how it is implemented.
db.User.findAll()
  .then(function(users) {
    console.log(users);
  })
  .catch(function(err) {
    console.error(err);
  });
var userEmail = 'example@gmail.com';
db.User.findOne({ where: { email: userEmail }})
  .then(function(user) {
    console.log(user);
  })
  .catch(function(err) {
    console.error(err);
  });
db.User
  .findAll({
    limit: 5,
    order: [ ['id', 'DESC'] ]
  })
  .then(function(users) {
    console.log(users);
  })
  .catch(function(err) {
    console.error(err);
  });
Once you are ready to deploy your app, you will need to create an account with a cloud platform to host it. These are not the only choices, but they are my top picks. From my experience, Heroku is the easiest to get started with, it will automatically restart your Node.js process when it crashes, zero-downtime deployments and custom domain support on free accounts. Additionally, you can create an account with MongoLab and then pick one of the 4 providers below. Again, there are plenty of other choices and you are not limited to just the ones listed below.
Note: To install Heroku add-ons your account must be verified.
Add these two lines to app.js, just place them anywhere before app.listen():
var IP_ADDRESS = process.env.OPENSHIFT_NODEJS_IP || '127.0.0.1';
var PORT = process.env.OPENSHIFT_NODEJS_PORT || 8080;
Then change app.listen() to:
app.listen(PORT, IP_ADDRESS, function() {
  console.log("✔ Express server listening on port %d in %s mode", PORT, app.settings.env);
});
Add this to package.json, after name and version. This is necessary because, by default, OpenShift looks for server.js file. And by specifying supervisor app.js it will automatically restart the server when node.js process crashes.
"main": "app.js",
"scripts": {
  "start": "supervisor app.js"
},
git push -f openshift master-f (force) flag because OpenShift creates a dummy server with the welcome page when you create a new Node.js app. Passing -f flag will override everything with your Express Starter project repository. Please do not do git pull as it will create unnecessary merge conflicts.git remote add azure [Azure Git URL]git push azure master
cf push [your-app-name] -m 512m command to deploy the application[your-app-name]cf create-service mongodb 100 [your-service-name] to create a MongoDB servicecf bind-service [your-app-name] [your-service-name] to associate your application with a service created abovecf files [your-app-name] logs/env.log to see the *environment variables created for MongoDB.mongodb://68638358-a3c6-42a1-bae9-645b607d55e8:46fb97e6-5ce7-4146-9a5d-d623c64ff1fe@192.155.243.23:10123/dbcf set-env [your-app-name] MONGODB [your-mongodb-uri]cf restart [your-app-name] for the changes to take effect.Note: Alternative directions, including how to setup the project with a DevOps pipeline are available at https://ibm.biz/hackstart. A longer version of these instructions with screenshots is available at https://ibm.biz/hackstart2. Also, be sure to check out the Jump-start your hackathon efforts with DevOps Services and Bluemix video.
TODO
If something is unclear, confusing, or needs to be refactored, please let me know. Pull requests are always welcome, but due to the opinionated nature of this project, I cannot accept every pull request. Please open an issue before submitting a pull request. This project uses Airbnb JavaScript Style Guide with a few minor exceptions. If you are submitting a pull request that involves Jade templates, please make sure you are using spaces, not tabs.
The MIT License (MIT)
Copyright (c) 2015 Piotr Dąbrowski
Permission is hereby granted, free of charge, to any person obtaining a copy of this software and associated documentation files (the "Software"), to deal in the Software without restriction, including without limitation the rights to use, copy, modify, merge, publish, distribute, sublicense, and/or sell copies of the Software, and to permit persons to whom the Software is furnished to do so, subject to the following conditions:
The above copyright notice and this permission notice shall be included in all copies or substantial portions of the Software.
THE SOFTWARE IS PROVIDED "AS IS", WITHOUT WARRANTY OF ANY KIND, EXPRESS OR IMPLIED, INCLUDING BUT NOT LIMITED TO THE WARRANTIES OF MERCHANTABILITY, FITNESS FOR A PARTICULAR PURPOSE AND NONINFRINGEMENT. IN NO EVENT SHALL THE AUTHORS OR COPYRIGHT HOLDERS BE LIABLE FOR ANY CLAIM, DAMAGES OR OTHER LIABILITY, WHETHER IN AN ACTION OF CONTRACT, TORT OR OTHERWISE, ARISING FROM, OUT OF OR IN CONNECTION WITH THE SOFTWARE OR THE USE OR OTHER DEALINGS IN THE SOFTWARE.
Humus.js is a Node.js webapp framework. Visit Snyk Advisor to see a full health score report for humus, including popularity, security, maintenance & community analysis.
The npm package humus receives a total of 89 weekly downloads. As such, humus popularity was classified as limited. Visit the popularity section on Snyk Advisor to see the full health analysis.
The npm package humus was scanned for known vulnerabilities and missing license, and no issues were found. Thus the package was deemed as safe to use. See the full health analysis review.
Minimize your risk by selecting secure & well maintained open source packages
Scan your application to find vulnerabilities in your: source code, open source dependencies, containers and configuration files
Easily fix your code by leveraging automatically generated PRs
New vulnerabilities are discovered every day. Get notified if your application is affected